Sunday, May 29, 2011

Crustacean Nation

I have probably eaten more shrimp in my life than the average person because I lived in South Louisiana for many years.  I can categorically state that Gulf shrimp's taste and quality is far superior to its Asian (Thailand, China, Vietnam) counterparts.  Before the tragic oil spill of 2010, about 70% of the shrimp consumed in the U.S. came from the Gulf of Mexico.  The crawfish, crabs, and shrimp that Louisiana supplies earn it the title of Crustacean Nation in my book!


Now that I live in Texas, obtaining good quality shrimp is a little more of a challenge.  Fortunately, parts of Texas are on the Gulf of Mexico, too, so we often have access to high quality shrimp even here in land-locked Dallas.  The price, though, is significantly higher than what we used to pay in Louisiana.

Believe it or not, whenever we drive to South Louisiana, we take a couple large coolers and bring back fresh shrimp.   We go to an open-air market in Westwego on New Orleans' Westbank where fishermen directly sell fish, crabs, and shrimp to the consumer.

Source:  www.bestofneworleans.com
The last time we bought shrimp there (over a year ago--before the spill), we paid $2.50 a pound for 16/20 count heads-on shrimp.  (The 16/20 count means that there are between 16 and 20 shrimp to the pound).  The more you buy, the better deal you get.  We normally buy about 50 pounds, but when we lived in Louisiana, we used to buy more.

The best way to freeze shrimp is to de-head them (keep the shells on, though), load them into quart-sized Ziplock freezer bags (about 1 1/2 to 2 pounds per bag) and fill the bags with water.  Then lay the bags flat on a sheet tray and pop them in the freezer.  When the individual bags are frozen, load several bags into a gallon-sized Ziplock freezer bag for extra protection.


Shrimp frozen in this manner taste fresh many, many months later.  I am just finishing the shrimp we got over a year ago, and they are still high quality in both taste and texture.  To defrost, plug your sink and fill halfway with tepid water.  Slit the ziptop bags and let the shrimp thaw in the water, stirring occasionally to separate.

Today I made Louisiana shrimp with Asian flavors.  This is an interesting twist on traditional boiled shrimp cocktail.  Don't skip the homemade mayonnaise--it's delish!
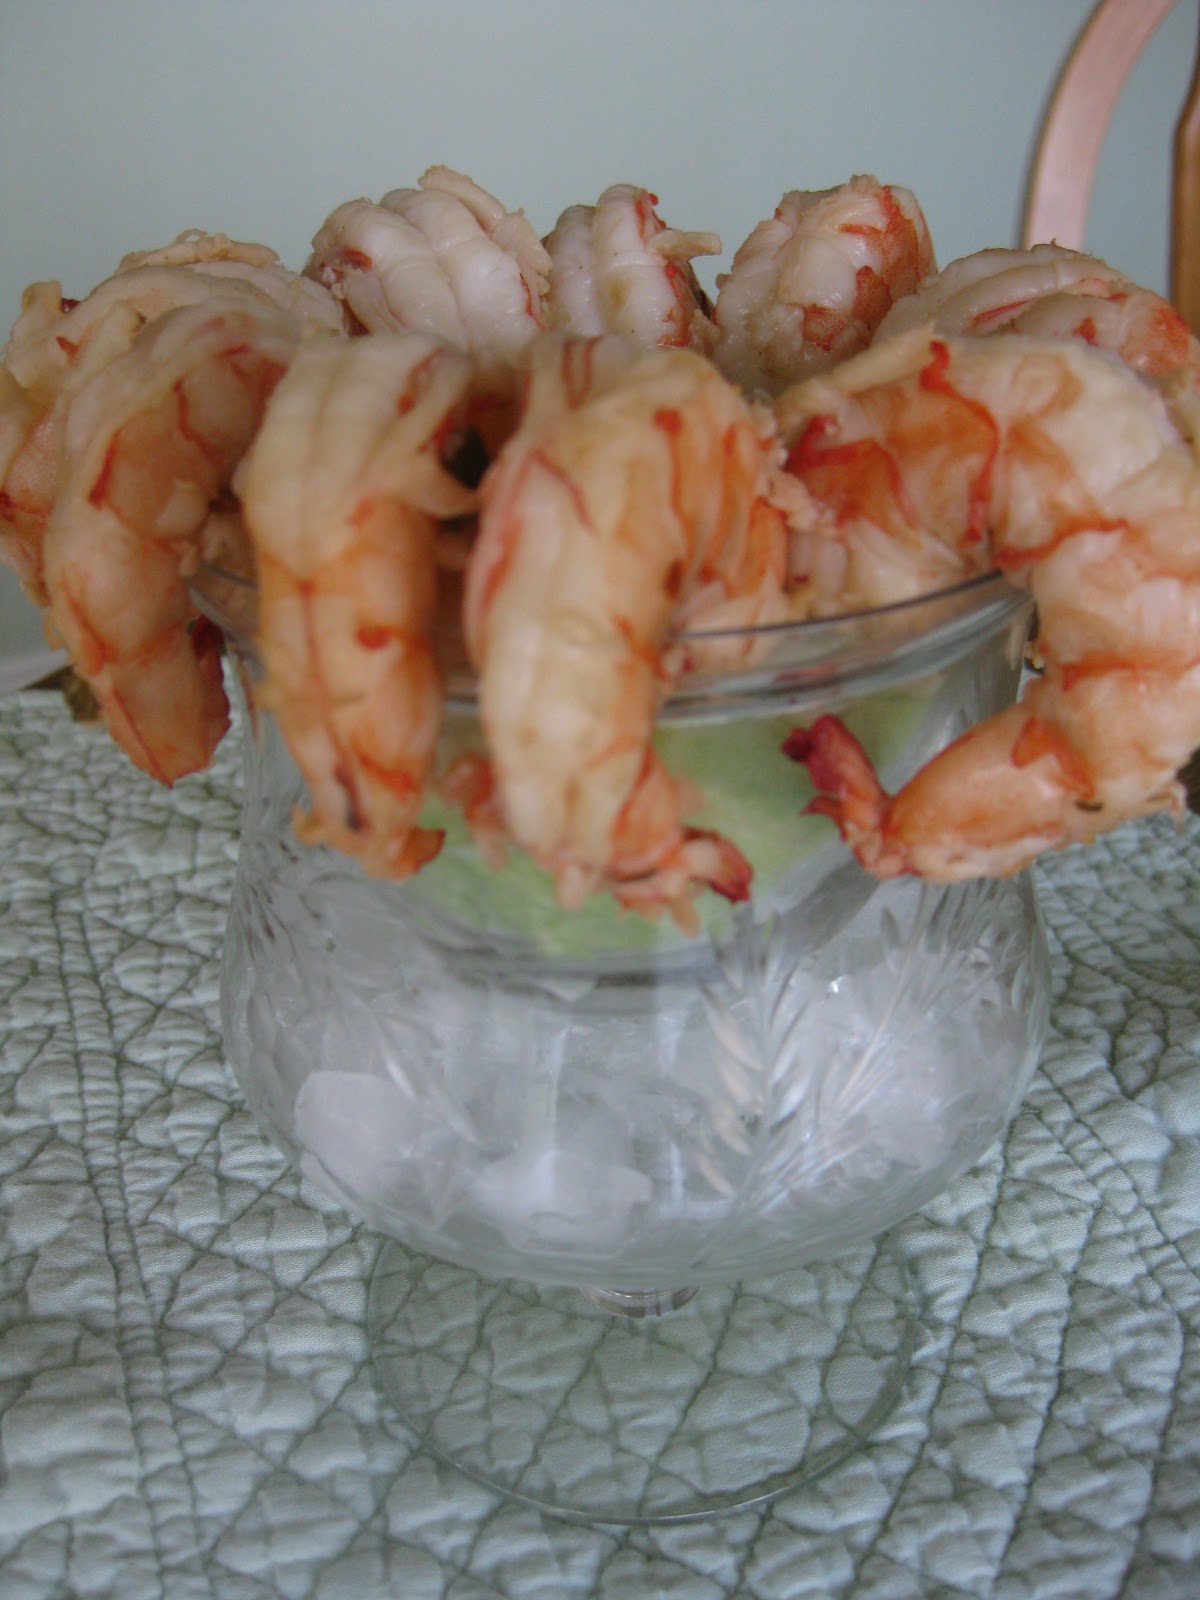


Asian Boiled Shrimp
Slightly adapted from Emeril's Potluck by Emeril Lagasse
(click here to print)


Boiling Liquid
One 2-inch piece of peeled ginger root, sliced
3 lemons, halved, juiced (reserve shells)
1/2 cup soy sauce (I use low-sodium)
1/4 cup sugar
4 bay leaves
2 Tbsp. chopped green onions (about 2 onions)
2 tsp. minced garlic (about 2 medium cloves)
1 Tbsp. kosher salt
1 tsp. ground pepper
2 tsp. crushed red pepper
6 cups water


Combine all ingredients in  a heavy saucepan and bring to a rolling boil.


Sprinkle 2 lbs. shelled and deveined Gulf shrimp with 2 tsp. Emeril's Essence (find recipe here)


Add shrimp to the boiling water.  Cook for exactly 2 minutes.  Remove from heat and let the shrimp steep for an additional 2 minutes.  You do not want to cook the shrimp longer or they will be rubbery.

Drain the shrimp and chill thoroughly.  Serve with Asian mayonnaise as a dipping sauce:

Asian Mayonnaise

1 large egg yolk (room temperature)
2 tsp. fresh lemon juice
1 tsp. minced fresh ginger
1/2 tsp. minced garlic (about 1 small clove)
1 tsp. green onion
1 cup vegetable oil (I used canola)
1 Tbsp. soy sauce
1 Tbsp. cilantro, chopped
1/2 tsp. ground pepper
1/2 tsp. sesame oil
1/4 tsp. salt


Combine egg yolk, lemon juice, garlic, ginger and green onions in food processor.  Process until combined.  SLOWLY add the oil through the feed tube while the motor is running so that it makes an emulsion (thickens).  Add soy sauce, cilantro, pepper, sesame oil, and salt.  Pulse a couple of times to combine.  Remove to bowl and chill thoroughly.  Let stand a couple of hours for best flavor, but use within 24 hours.


C'est Bon, Cher!

Linking to:


Thursday, May 19, 2011

My Flavorite Salad


I haven't been doing much cooking lately because my job has been intense, and the kids' school activities are consuming a lot of our time and energy.

Over the weekend, I got some beautiful strawberries from Costco.  I think that Driscoll brand berries (all types) are usually very high quality and flavorful.  In my experience, they're worth the little extra price that you pay.


I decided to make my favorite salad as a side for tonight's dinner.  This salad has an awesome balance of flavors and textures:  sweet fruit, crunchy nuts, a mixture of crisp greens, and a sweet and tangy salad dressing.  I never have any leftovers.

Spring Mixed Strawberry Almond Salad
Adapted from Allrecipes.com
(click here to print)

Salad Dressing:

1/2 cup canola or vegetable oil
1/4 cup cider vinegar
1/4 cup white wine or champagne vinegar
1/4 tsp. paprika
2 tsp. dried chopped or minced onion
1/3 cup sugar
2 tsp. poppy seeds

Combine all ingredients in a small saucepan and heat for a couple of minutes or until the sugar dissolves.  You can also do this in the microwave, if you prefer, but watch it closely and make sure your cup is large enough so it doesn't overflow.  Cool.  (I pour it into a pyrex measuring cup and put it in the freezer to speed up the cooling process.)

Salad Ingredients:

3/4 cup sliced almonds
3 Tbsp. sugar
2 Tbsp. sesame seeds (optional)
1 lb. fresh strawberries
1 lb. Spring Mix or salad greens of your choice

Combine almonds, sugar, and sesame seeds (if using) in a small nonstick skillet.  Cook over medium heat, stirring occasionally, until sugar caramelizes and coats the almonds.   Turn nuts out onto a piece of waxed paper or parchment to cool.  Guard the nuts zealously or munchkins will eat them all when your back is turned. 


Wash and spin dry 1 lb. of Spring Mix or the lettuce(s) you prefer.


Slice 1 lb. of fresh strawberries.


Just before serving, combine strawberries, sugared almonds, salad greens, and some of the salad dressing.  Toss well and serve immediately.

If you have a small family, you can halve this recipe.  Or keep the extra ingredients (separated) in the refrigerator and toss it together later.

Linking to:

Miz Helen’s Country Cottage


Wednesday, May 18, 2011

Backyard Bliss

Here are a few things from my backyard that make me happy:

My son was mowing the lawn and these creatures scattered out of one of our backyard bushes:
Flopsy, Mopsy, and Cottontail

My hydrangeas are loving the cooler days this Spring:


Tomatoes are coming in and we have picked our first of the season.


We finish ripening them on the kitchen counter so that the birds don't enjoy the fruits of our labor:


I see fire-roasted tomato salsa in my future!

Monday, May 16, 2011

Top 5 Painting BFF's

I've been doing some painting around the house with my bathroom face lift.  I would say that I am quite experienced on the interior painting front.  I have painted 8 rooms in my current house and 10 rooms in my former house, some of them two or three times over the course of 14 years.  I have painted walls, ceilings and trim, and have used latex, acrylic, and oil-based paints.  Nothing transforms a room as quickly and cheaply as paint does.

So here are my Top 5 Painting Products, in no particular order.

A Good-quality Brush

Purdy Brush - About $11

The brush brand I prefer is Purdy.  I think that the 2-inch angled brush above is the most versatile for interior use.  It is great for trim and cutting in.  The bristles are nice and tight but soft.  Cheap brushes "shed," and I hate picking hairs out of wet paint.  With proper cleaning and care, these brushes will last for years.

Most synthetic (usually nylon) brushes can be used with both oil-based and latex paints, but always check the label to make sure.  I just bought a natural-bristle brush that is for use with oil-based paint only.  It is supposed to minimize brush marks.  Make sure you keep a separate brush for oil-based use.  In other words, don't use one brush for two different types of paint, even if you clean it afterwards.

Twist and Reach Roller Frame

Twist and Reach Roller Frame - About $12

My current house has 10 foot high ceilings, and 12 foot high in some rooms.  I don't like using a ladder that's too high because it makes me feel a little unsteady.  This roller frame telescopes to extend your reach from 18 to 34 inches which comes in handy when you're just too short to reach an area and don't want to take out a taller ladder.  It's more flexible than a rigid extension pole because you can choose the length.    I used this a lot in my last house (8 foot high ceilings) because I would often stand on a folding chair to paint and would use this to roll the upper part of the wall after I cut in.  The handle of this roller frame is padded, too, so it's comfortable to hold.

Blue Painter's Tape and Frog Tape


The two tapes above are invaluable to me.  I ALWAYS use tape to mask off the trim and ceiling when I'm painting the walls.  Why?  Because I don't have a steady hand, and it is far easier to mask it off than to do the aggravating touch ups later.  I buy tape in 1 1/2 inch or 2 inch widths.  The Frog tape is especially good to prevent bleed through on the edges.  So if you're painting stripes, for example, and want a crisp, clean edge, Frog tape is what you should use.

I have had good success with both tapes, but the key is to make sure that your tape is well adhered before you start to paint.  The beauty of this tape is that it can be left on for days and will still release easily, unlike traditional masking tape.

Paint Conditioner

For Latex Paint - About $5 a Qt.

For Oil-Based Paint - About $11 a Qt.

Paint conditioner is a paint additive which helps to eliminate brush and roller marks.  While not a necessity, it does give a smoother finish by minimizing drag on your brush and roller.  I find it especially useful for painting furniture and trim.  Floetrol is the product for latex paints, and Penetrol is the product for oil-based paint.  Follow package instructions to determine the proper amount to add to your paint.


Paint Tray Liner

The worst part of painting, in my opinion, is the cleanup, so I do whatever I can to make this chore easier.  I have an extra-deep plastic paint tray, and I purchase a disposable liner for less than a dollar.  It fits inside my existing tray, and when I'm done with it, I just throw it away. 

I hope that you consider one or all of these products the next time you get the urge to paint!  Do you have a favorite tool or technique you use to make painting easier or more pleasurable?  Do tell!


Friday, May 13, 2011

Bead Dazzled

My friend Lisa started a craft group a few months ago, and today's project was jewelry making.

We are fortunate to live in a town that has a wholesale bead store, so we headed over there a week ago and picked up some supplies.  I have only made one piece of jewelry in my life and swore I would never do it again because I found it very difficult.  I think the problem is that I chose very tiny seed beads and had to use the dreaded needle (I am sewing-challenged).  I kept dropping the microscopic beads and couldn't see well enough to thread the needle through the bead...you get the picture.

Well now I have the added complication of carpal tunnel (right-hand fingers are somewhat numb) so I was a little reluctant.  But I decided if I chose bigger beads, I might be able cobble something together.

Look what I made!!


I chose the stone pendant first and then the aquamarine-colored gems, irregularly-shaped freshwater pearls and beautiful iridescent Swarovski crystal beads (my fave).


Our hostess, Pilar, had gazillions of beads, jewelry-making tools, and knowledge.  She graciously let me raid her stash for the silver ball spacers.  She put the clasp on, which was the most difficult part of this project.    She used a crimping bead, a little horseshoe-shaped thingy to cover the wire (can't remember what she called it?),  the clasp, and a little glue.

She made it look easy, but I know it isn't.


I am very proud of myself and my kids were, frankly, amazed that I made this.  I think it's good for them to see that even I am still learning new things that are outside of my comfort zone.   My unique, one-of-a-kind creation probably cost about $20, but I have enough beads left over for another project.  Someday.

Wednesday, May 11, 2011

Jack and His Incredible Sicilian Meatballs

Louisiana men really know how to cook.  Food is such a huge part of the culture that I think it's bred into them at an early age.   At the local seafood boils, fish fries, and food festivals, men often do more of the cooking than the women do.


In New Orleans, if you aren't eating, you're TALKING about eating.  And everything you taste is the best thing you ever put in your mouth.  Until the next bite.

Food is a bridge that connects us to others.

Crescent City Connection
I had a neighbor named Jack, and we would often share food.  He had a sweet tooth, so I would bring him cake or cookies or fudge.  He would reciprocate by bringing us seafood or his fabulous meatballs (his Sicilian grandmother's recipe).


I have never had meatballs that are better than Jack's.  I think the secrets are the copious amounts of garlic, the large size of the meatball, and simmering them in the sauce.  (Fun fact:  In New Orleans, Red Gravy is another name for marinara sauce.)

One day I cornered Jack and got him to share the recipe for his meatballs.  He wrote it out for me, and I treasure that yellowed piece of paper.


Jack's Incredible Sicilian Meatballs
(click here to print)
Yields about 24 meatballs or enough to feed a mob

1 lb. ground beef (I used 85% lean)
1 lb. ground pork
1 lb. ground veal (if it's too expensive, Jack says you can use 1 1/2 lbs. each of beef and pork instead)

3-4 large eggs, lightly beaten
1/4 cup chopped Italian parsley
3-4 slices white bread, soaked in milk then squeezed out
6 large cloves garlic, minced
1 cup high-quality romano cheese, grated
salt and pepper to taste (be careful with the salt because the romano is already salty)

Preheat oven to 375 degrees.  Combine eggs, parsley, bread, garlic, and cheese and mix well.


 Add raw ground meat and mix lightly but thoroughly.


Line a half-sheet pan (or two) with heavy duty foil and coat with olive oil.  Roll meat mixture into balls that are about 2 inches in diameter and place on foil.  Turn the meatballs once so both sides get a little oil on them.  Alternately, you could mist the meatballs with olive oil cooking spray.  Jack browns his meatballs in a skillet on the stove top, but baking them requires less tending and mess, in my opinion.


Bake meatballs for about 20 minutes, turning once.  You want a brown crust but don't want to cook them all the way through.
If using immediately, simmer your marinara sauce while the meatballs are in the oven, then drop the balls into the sauce after they come out of the oven to finish cooking, about 10-15 minutes or so.  I used jarred marinara.

Or you can cool the meatballs, store in an airtight container and refrigerate or freeze for future use.


While I don't think my meatballs can hold a candle to Jack's (even using his recipe!), I'll smile when we enjoy these and remember my friend and the friendship and food we shared for more than a decade.

Linking to:


Photobucket