Showing posts with label Cookies and Bars. Show all posts

Friday, December 23, 2011

Santa's Whiskers

When I was growing up, my mom went a little wild with the Christmas baking and decorating.  In those days, most moms were stay-at-home moms, but not all of them were experts in the domestic arts like my mom was. She would decorate every room, wrap each gift exquisitely, then make handmade chocolates, English toffee, fudge, and dozens and dozens of assorted cookies.  I'm sure that if blogging had existed back then, she would have loved contributing.

Today, unbeknownst to her, she is contributing through me.  These are my favorite childhood cookies.  They start with a shortbread dough but red and green candied cherries and pecans are stirred in.


Then the whole (yule) log is rolled in coconut (the "whiskers").  The name alone is so festive, and the taste and appearance are very merry indeed!


Santa's Whiskers
(click here to print)

2 1/2 cups flour
1 cup sugar
1 cup butter, softened
2 Tbsp. milk
1 tsp. vanilla

1/2 cup finely chopped candied cherries
1/2 cup finely chopped green candied cherries
1/2 cup finely chopped pecans
1 egg white, beaten
1 cup coconut

Cream butter, sugar, milk and vanilla.  Add flour and mix until just combined.  Stir in cherries and nuts by hand.  (I chopped the fruit and nuts in my food processor.)


Form dough into 2 logs, each 2 inches in diameter and 8 inches long.


Brush with egg white and roll in coconut.


Wrap and chill overnight.

Preheat oven to 375 degrees.  Slice cookies 1/4 inch thick and bake on ungreased baking sheet for 12 minutes or until golden brown around the edges.


Cookie Time!


Linking to:

Friday Food at Momtrends


Sunday, December 18, 2011

Toothsome Treats

My 16-year-old son is getting his wisdom teeth out tomorrow; we scheduled it to coincide with his Christmas break.  Ouch!

So today I made his favorite cookie bar so that he could indulge a little before he has to be on a liquid and soft food diet.


Pecan Pie Squares
Original recipe from Taste of Home magazine
(click here to print)

Crust:
3/4 cup (12 Tbsp.) cold butter, cut in chunks
2 cups flour
1/3 cup sugar
1/4 tsp. salt (omit if using salted butter)

Filling:
4 large eggs
1 1/2 cups light corn syrup
1 1/2 cups sugar
3 Tbsp. butter, melted
1 1/2 tsp. vanilla
2 1/2 cups chopped pecans

Preheat oven to 350 degrees.  Generously spray a 13x9 inch pan with non-stick spray.   Combine flour and sugar, then cut in butter until there are coarse crumbs.


Press evenly into the pan bottom and partially up the sides and bake for 20 minutes or until lightly golden.

Meanwhile, combine the filling ingredients.  Spread the filling evenly over the partially-baked crust.


 and return to the oven for an additional 25-30 minutes or until set.  Remove to a wire rack to cool.

When bars reach room temperature, cut around the perimeter to loosen, then cut into squares.


Store in the refrigerator but serve at room temperature.

The original recipe called for this to be made in a 15x10 inch pan, but I like these bars a little thicker.  They taste just like pecan pie!


Friday, April 8, 2011

Cutout Cookie-mania

My friend, Lisa, started a craft group a couple of months ago, and we meet one Friday a month.  I've met a few new friends, including Chantal who is an expert quilter and seamstress.  Today was my day to host and pick the theme.  I sometimes feel like I'm all thumbs when it comes to crafts (especially if needles are involved), so I chose to do something I know a little something about:  Cookies!


We learned how to decorate cutout cookies with royal icing.  Even though I am the daughter of a former cake-decorating genius mom, I had never worked with royal icing before.  So we all learned together!

On a roll

I started by making about 4 dozen cutout cookies in Spring shapes:  snails, bunnies, dragonflies, butterflies, frogs, and flowers.


Here's the recipe I use.  The cookies are nice and soft and have a good flavor.  They also roll out beautifully.

Cream Cheese Cutout Cookies
(click here to print recipes)

2 sticks butter, softened
3 oz. cream cheese, softened
1 cup sugar
1 large egg yolk
1 tsp. vanilla
2 1/2 cups flour

Cream the butter and cream cheese until light and fluffy.  Gradually add the sugar and beat well.  Add the egg yolk and vanilla and mix thoroughly.  Turn the mixer to low speed and gradually add the flour, mixing until just combined.

Flatten the dough into a disk, wrap in plastic wrap, and chill for about 30 minutes or so.  In the meantime, preheat the oven to 350 degrees. Roll the dough on parchment paper or another non-stick surface, to about 1/4 inch thickness.  Cut into desired shapes and place on ungreased cookie sheet.


Bake for 9-10 minutes or until barely brown around the edges.  Let cool on the sheet for 5 minutes before transferring to cooling racks.

Next, I had to figure out how to make royal icing.  I looked on YouTube (isn't the internet great?!) and found that royal icing is used two ways on cutout cookies:  It's piped around the edge of the cookies to form a barrier (dam), and the inside of the cookie is then flooded with thinned icing.


Here is the recipe I used since I didn't want to use raw egg whites:

Royal Icing

4 cups sifted powdered sugar (about 1 lb.)
3 Tbsp. meringue powder (available near the cake decorating supplies)
6-8 Tbsp. warm water
1/4 tsp. lemon extract (or extract of your choice)

Combine all ingredients and beat with electric mixer on LOW for 8-10 minutes.  The icing should initially have the consistency of a thick Elmer's glue. (Ribbons will stay on the surface of the icing when the beaters are lifted.)

Divide the icing into bowls and tint with food coloring.  Put each color into a separate piping bag (we used quart-sized ziptop bags fitted with a #3 or #4 plain tip.  Clip off the edge of bag if using that.  Pipe around the outside of cookies to form a barrier.

Let dry for about 10 minutes.  Then thin the remaining colored  frosting with a little water so that it is about the consistency of heavy cream.  Pour into squeeze bottles and flood the interior of the cookie (i.e., fill it in).  Use a toothpick to spread the frosting around and to pop any bubbles you see.  Decorate with sprinkles, sanding sugar, or however you desire!

Here's how it all looked when we finished:


Oh wait.  That's probably not what you wanted to see!


I wish that I could claim that these beauties were mine, but let's just say we definitely had an overachiever or two in the group!  We all felt like we gained insight into decorating holiday cookies in a new way, and we had a blast making these and just hanging out.

I think next month we may be doing something with...needles.  Uh oh.


Linking to:


Sunday, January 30, 2011

Luscious Lemon Melting Moments

This weekend has been positively Spring-like in Texas!  It has been about 70 degrees with sunny blue skies.  Perfect!

We got together with some friends last night, and I wanted to bring a sweet treat.  With such warm, cheerful weather, I thought that lemon bars would radiate the same sunshiny vibe of the day.  And with a name like "melting moments," I'm sure that those of you in the North could almost forget about the snow after taking a bite of one of these lovelies.


Luscious Lemon Melting Moments
(click here to print)


Crust:
2 sticks (1 cup) butter, softened (no substitutes)
2/3 cup powdered sugar
2 cups flour
1/8 tsp. salt

Lemon Filling:
6 large eggs, room temperature
2 cups white sugar
2 T. grated lemon zest (4-6 lemons, depending on size)
3/4 cup fresh lemon juice (fresh lemons make a huge difference in flavor)
3/4 cup flour

Preheat oven to 350 degrees and grease a 9x13 inch pan generously.


Cream the butter, then add sugar and beat with an electric mixter until light.  Add flour and salt and mix on low (so you don't get a flour shower!) just until combined.  The dough will be somewhat crumbly.


Empty the dough onto a floured cloth or board and gather into a ball.  Flatten into a disk with hands and  then press it into the pan, building up the edges slightly.  Bake for about 20 minutes or until slightly golden on top and around the edges.


Meanwhile, beat the eggs until light.  Add sugar, zest, lemon juice, and flour.  Mix well.  Pour over the hot crust and return to the oven for an additional 25-30 minutes or until the filling is set.  Let cool to room temperature.

For easier cutting, refrigerate the bars for about an hour, then cut into pieces.  Dust with powdered sugar.  I think these taste best cold, like little lemon pies.  They have a generous amount of the smooth, tart filling. Yum! 


Lemons will yield more juice if you microwave them briefly (about 20 seconds) before you cut them.  You can also roll them on the counter while applying pressure.  This releases the juice from the membranes. 


I'm linking this to Funky Junk Interior's SNS.

Sunday, December 19, 2010

My Signature Chocolate Mint Brownies

Recipes are a living, breathing thing.  These chocolate mint bars were made by both my mom and my mother-in-law in the 1970s.   They lived a thousand miles apart but their recipes were almost identical.


Now, almost 40 years later, the recipe is still going strong but has evolved.  I am still using the basic recipe but have tweaked it to make it my own: more chocolately and less sweet.  These are my signature Christmas bar; people go crazy for them.  I had someone hunt me down after they tried one at a teachers' appreciation event .  I think that the creamy, cool peppermint buttercream frosting topped by crunchy candy-cane bits (my addition for Christmas) and a bitter chocolate glaze is perfect for the winter holidays.

Chocolate Mint Bars
(click here to print recipe)

Brownie Base

1 cup (2 sticks) margarine
4 oz. (squares) unsweetened chocolate
1 1/2 cups sugar
3 eggs, beaten
1 tsp. peppermint extract
1 cup flour

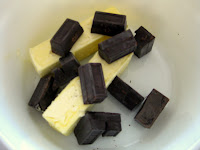
Preheat oven to 350 degrees (325 degrees if you're using a dark coated or glass pan).  Melt the chocolate and butter on HIGH in the microwave for 2 1/2 minutes or until almost melted.  Stir well.


Add sugar, eggs, and peppermint extract.  Mix in by hand.


Add the flour last and mix only until combined.  Pour into a well-greased 9x13" baking pan.


Bake for 20 minutes or until toothpick comes out with moist crumbs attached.   Let cool completely.

In the meantime, make the
Peppermint Buttercream:

6 T. butter, softened
3 cups powdered sugar, sifted.
3 T. milk
2 tsp. peppermint extract
2-3 candy canes (optional)

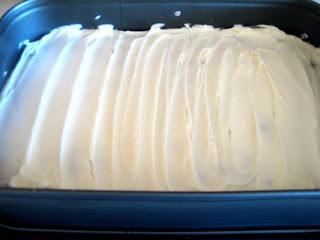
Combine all ingredients and mix well using an electric mixer or food processor.  Spread evenly over cooled brownies.


If using the candy canes, unwrap them, put in a ziptop bag, and pound into crumbs with a hammer or meat mallet.  Sprinkle evenly over the frosting.


Glaze:

Melt 2 squares unsweetened chocolate with 2 T. butter in the microwave for about 30 seconds.  Use a fork to decoratively glaze the brownies, letting some of the frosting peek through.  Refrigerate until chocolate hardens.  Cut brownies into squares or fingers and serve at cool room temperature for best flavor.  Store in an airtight, covered container in the refrigerator.


Wednesday, December 1, 2010

Christmas Sweets - Cha-Cha-Cha Cookies

I have dubbed these Cha-Cha-Cha Cookies because they hit the trifecta of cookie-dom:  Chocolate,  Cherries,  and Chewiness.  These put a new spin on chocolate chip oatmeal cookies and would be great on any holiday cookie platter.


Cha-Cha-Cha Cookies
aka Chocolate-Chunk Oatmeal Cookies with Pecans & Dried Cherries
Adapted from Cooks Illustrated magazine
(click here to print recipe)

1 1/4 cup flour
3/4 tsp. baking powder
1/2 tsp. baking soda
1/2 tsp. salt

1 1/2 sticks (12 T.) butter, softened (do not use margarine)
1 1/4 cups light or dark brown sugar (dark gives a deeper flavor)
1 large egg

1 1/4 cups oatmeal (regular or quick oats but NOT instant)
1 cup dried cherries
1 cup pecans, coarsely chopped
1 cup semi-sweet or bittersweet chocolate chips (I prefer Ghiradelli)

Preheat oven to 350 degrees.  Put the pecans in a small baking pan and toast for 5-10 minutes (set the timer so they won't burn) or until browned.

Measure dry ingredients (flour, baking powder, soda, and salt) and whisk to combine. 


Cream butter and brown sugar together until light.  Add egg.  Beat well.  Add dry ingredients and mix just until combined.  Add cherries, chocolate chips, pecans, and oatmeal and stir in by hand.


Use a cookie scoop (I used the 1 1/4 oz. size) or two tablespoons to drop the cookies on an ungreased baking sheet.  I put 12 on each sheet pan.  Flatten slightly with your hand. 


Bake for 10-11 minutes or until lightly browned.  If they crack slightly, the cracks should still look a little wet and underdone.  Don't overbake or they won't be chewy.

Cool on pan for 5 minutes, then transfer to a cooling rack.  Enjoy with a tall glass of ice cold milk.  Makes about 2 dozen.